Danger area - Explosives storage BUILDINGS
Marked as both "non-atomic storage" and "non-nuclear component" buildings on some of the Air Ministry derived diagrams, the Explosives Storage Buildings, known to the staff as 'DDs', were where the very large BLUE DANUBE and later the smaller RED BEARD bombs were kept. They were the largest buildings on the site.
The BLUE DANUBE bomb was some 5ft wide and about 24ft long, equivalent in size to a nominal 10,000 lb conventional bomb. As such, not only were large storage areas required, but also equipment and structures to safely load, unload and manoeuvre the weapons around. The weapon was not always stored as a whole, as it was built in 3 main parts and could be split up to aid storage and servicing.
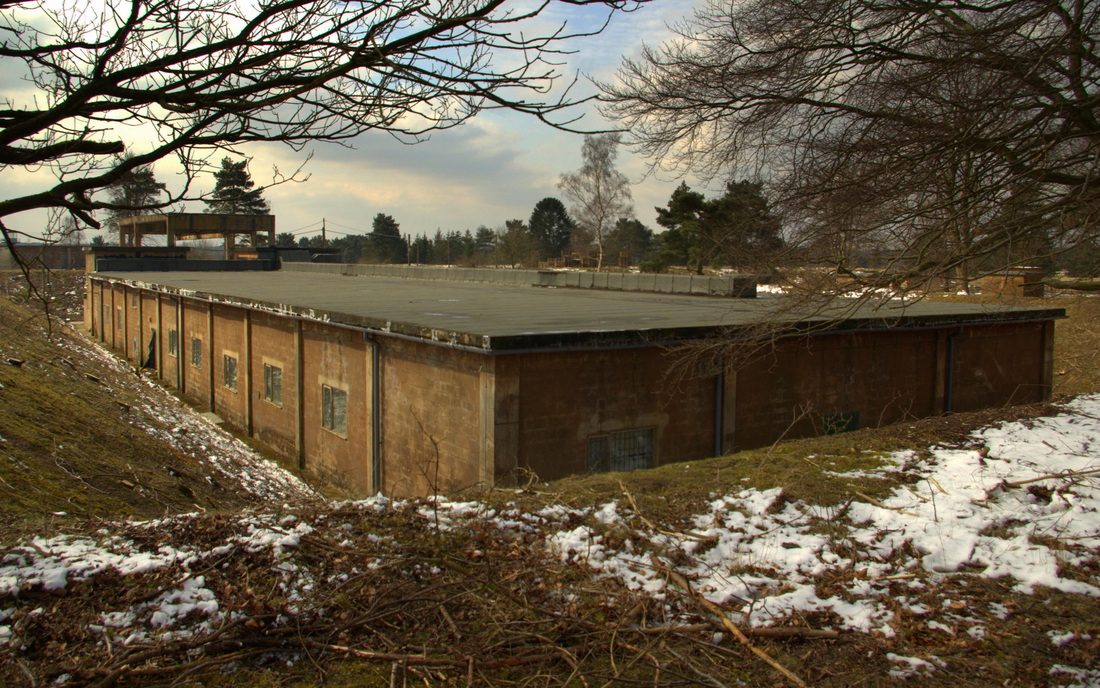
Barnham had 3 such DD storage buildings, each protected by earth traverses. Each rectangular building was approximately 58 metres long x 18 metres wide and was divided into 11 bays by 3 with two internal lines of supporting concrete pillars. Due to the size of BLUE DANUBE and its turning circle on a wheeled trolley, it has been reported that usually only one side of the buildings were used to house the bomb, positioned herring-bone fashion. Other components, such as spare tail units etc were stored on the other side. As weapons held at Barnham could be used for a second strike, it is likely that they were stored on airfield bomb trolleys in order to speed up out-loading and time taken for up-loading onto aircraft once the weapons arrived at their airfields, always providing the airfields still existed by the time a second strike was to be mounted.
The buildings were manned by only four men, 2 RAF Corporals and 2 RAF Airmen. The Corporals were of the Storeman trade, with a "Q" annotation of Ex-F (Fuels and Explosives). The 2 Airmen were Trade Assistant Generals. They were tasked with receiving the weapons from the various locations and unpacking them from their wooden crates and stillages, utilising the gantry cranes at the front of the buildings. The weapons were then placed in storage until the Aeronautical/Armament Inspection Service (AIS) personnel required them in the large maintenance building in the centre of the site (officially known as building 58). The building staff would also reload the empty boxes ready for them to be returned to the Royal Ordnance Factory for reuse. It is reported that RED BEARD came in two transit boxes containing the nose and centre sections which were paired together. The tail section came in a separate box and was fully interchangeable amongst the stock.
At the start of the working day, 2 men would get of the bus that brought them to Barnhamat the outer picket post. Here they would collect their B.E.V truck (truck armament special) and electric fork lift from the Generator/Power Buildings and drive them up to the large building. At the end of the working day these vehicles would be driven back to the Generator/Power buildings to be charged for the next day. They reportedly also had small electric hand operated fork lifts that were charged on site. The vehicles were used to move equipment and weapons in the storage buildings and to move the weapons to the main inspection building.
The BLUE DANUBE bomb was some 5ft wide and about 24ft long, equivalent in size to a nominal 10,000 lb conventional bomb. As such, not only were large storage areas required, but also equipment and structures to safely load, unload and manoeuvre the weapons around. The weapon was not always stored as a whole, as it was built in 3 main parts and could be split up to aid storage and servicing.
Barnham had 3 such DD storage buildings, each protected by earth traverses. Each rectangular building was approximately 58 metres long x 18 metres wide and was divided into 11 bays by 3 with two internal lines of supporting concrete pillars. Due to the size of BLUE DANUBE and its turning circle on a wheeled trolley, it has been reported that usually only one side of the buildings were used to house the bomb, positioned herring-bone fashion. Other components, such as spare tail units etc were stored on the other side. As weapons held at Barnham could be used for a second strike, it is likely that they were stored on airfield bomb trolleys in order to speed up out-loading and time taken for up-loading onto aircraft once the weapons arrived at their airfields, always providing the airfields still existed by the time a second strike was to be mounted.
The buildings were manned by only four men, 2 RAF Corporals and 2 RAF Airmen. The Corporals were of the Storeman trade, with a "Q" annotation of Ex-F (Fuels and Explosives). The 2 Airmen were Trade Assistant Generals. They were tasked with receiving the weapons from the various locations and unpacking them from their wooden crates and stillages, utilising the gantry cranes at the front of the buildings. The weapons were then placed in storage until the Aeronautical/Armament Inspection Service (AIS) personnel required them in the large maintenance building in the centre of the site (officially known as building 58). The building staff would also reload the empty boxes ready for them to be returned to the Royal Ordnance Factory for reuse. It is reported that RED BEARD came in two transit boxes containing the nose and centre sections which were paired together. The tail section came in a separate box and was fully interchangeable amongst the stock.
At the start of the working day, 2 men would get of the bus that brought them to Barnhamat the outer picket post. Here they would collect their B.E.V truck (truck armament special) and electric fork lift from the Generator/Power Buildings and drive them up to the large building. At the end of the working day these vehicles would be driven back to the Generator/Power buildings to be charged for the next day. They reportedly also had small electric hand operated fork lifts that were charged on site. The vehicles were used to move equipment and weapons in the storage buildings and to move the weapons to the main inspection building.
Northern Explosives Storage Building
|
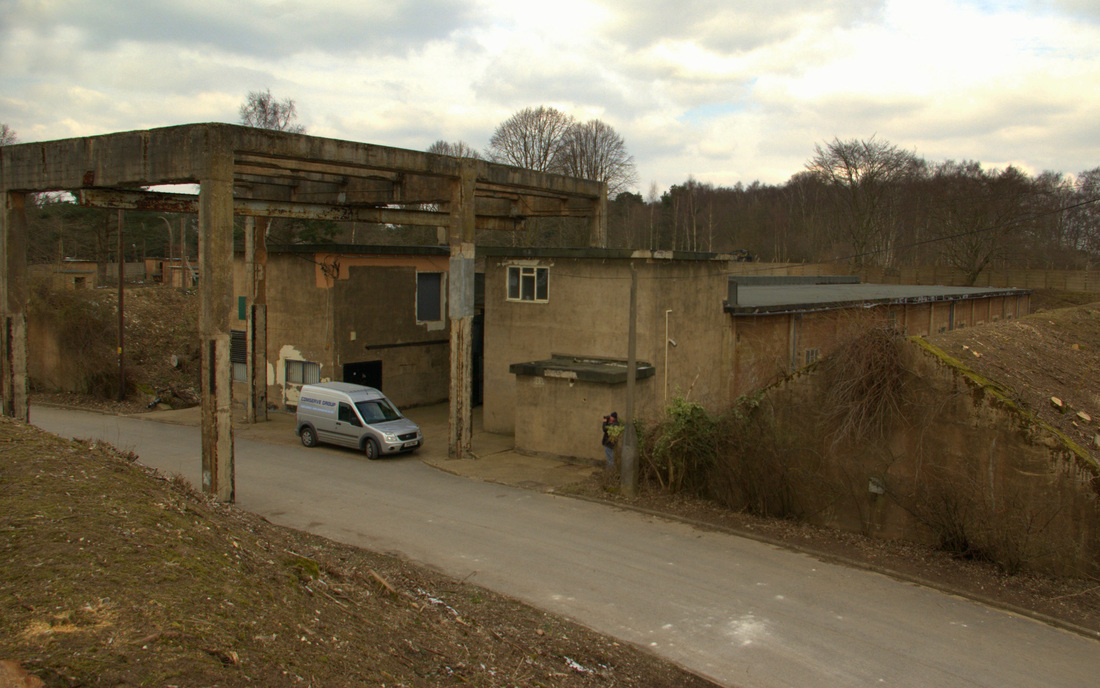
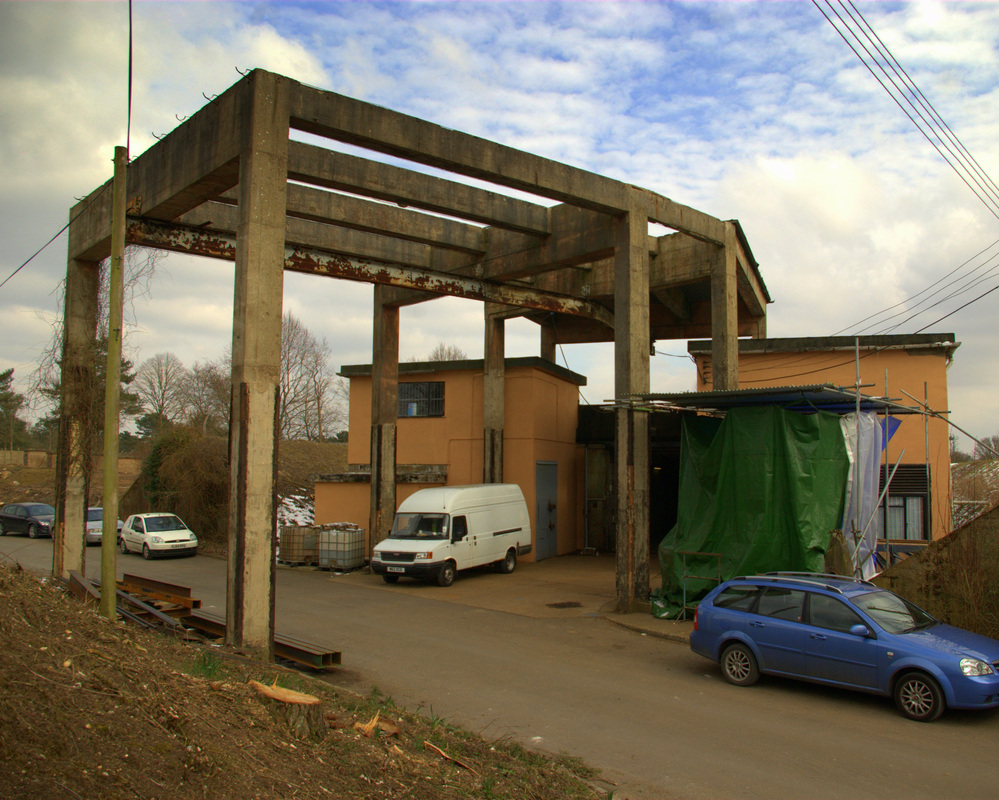
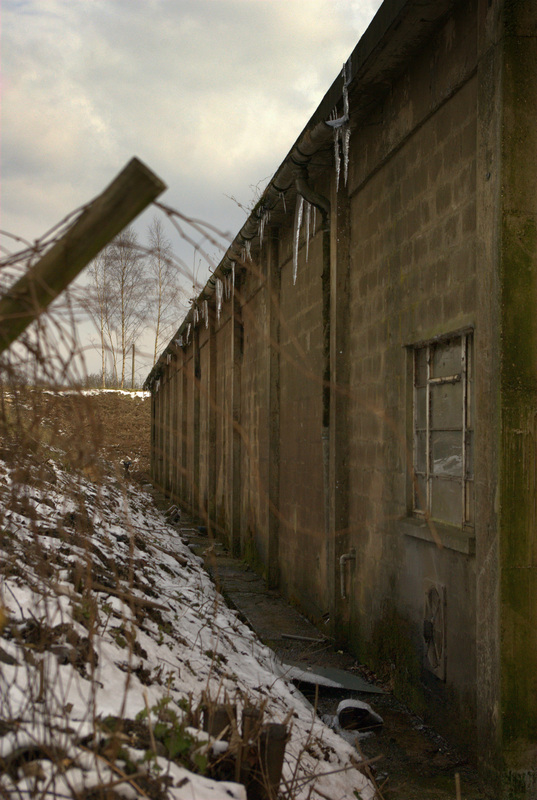
Picture NA1 © Sam Tolley. The front of the building. The high concrete pillars are there to support a heavy duty gantry crane (the rail is there but the motor and hook are gone). This photo was taken from the U-shaped earth traverse between this building and the maintenance and repair builing. On the image right is one of the blast berms that surrounds this building.
None of the walls was joined conventionally so that, in the event of an explosion they would simply blow out and release the blast which would then be deflected upwards by mounded earth traverses. |
|
Picture NA2 © Sam Tolley. View from the western aspect.

|
|
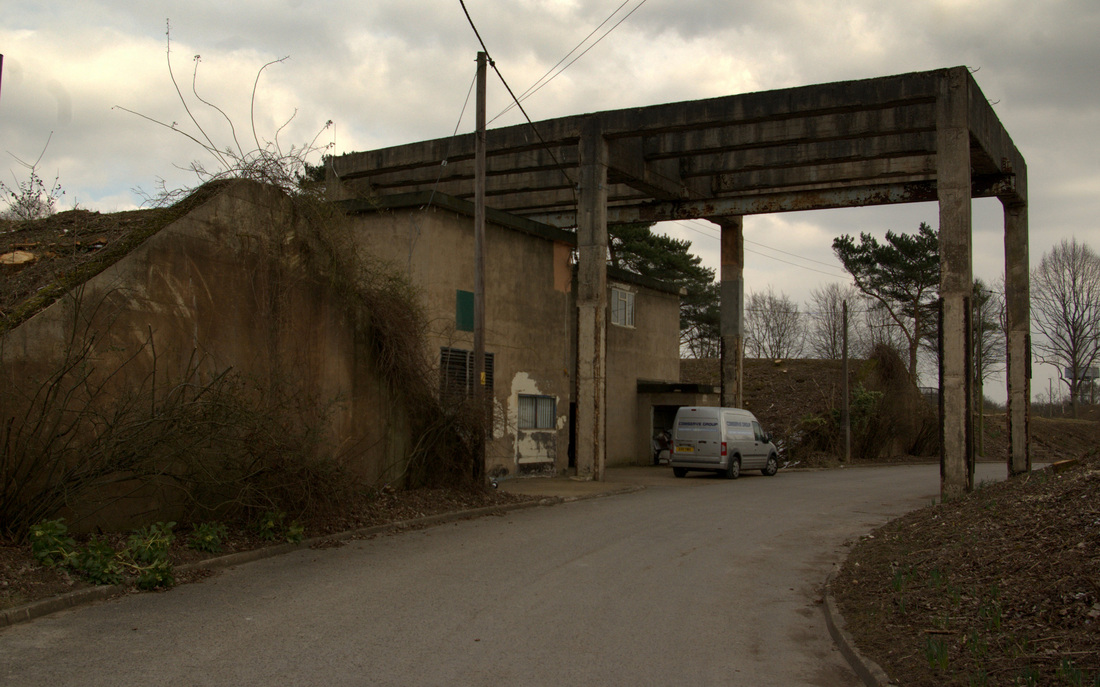
Picture NA3 © Sam Tolley. The metal gantry runner for the crane is still in place. The main door into the storage is in the centre with the ancillary buildings either side containing enviromental control and stand by generators.
|
|
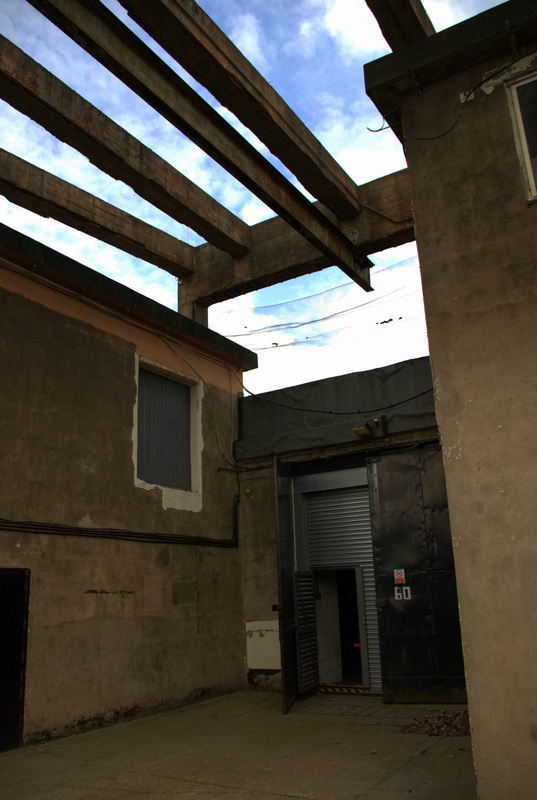
Picture NA4 © Sam Tolley. A view of an explosives storage building from the rear (looking through a partially dismantled element of the inner concrete wall). The air-conditioning units are visible on the right-hand side of the building roof.
The buildings were hollow, bar all the concrete pillars that supported the roof. This is no longer the case after internal walls were erected to house light industrial units within them. |
Eastern Explosives Storage Area
|
Picture NA5 © Sam Tolley. Front entrance to the eastern storage building. Similar to how the western building would have been, this entrance has a slight angle on the entrance to square the pillars off against the curve of the road.
|

|
Picture NA6 © Sam Tolley. The gantry crane is still in place .
As with the northern building, this one has the generator and environmental control buildings flanking the main entrance. Evidence of 'concrete cancer' can be seen on the pillars where the metal longerons rust and decay the concrete around them. This is prevalent on the whole site, from pillars to lampposts, and represents a major problem for the preservation of these components. |

|
Picture NA7 © Sam Tolley. A look through the entrance into the DD building. It would have been a vast open floor when operational, as can be seen in the image below. The 'new' walls turned the building into several work areas for various companies.
|
|
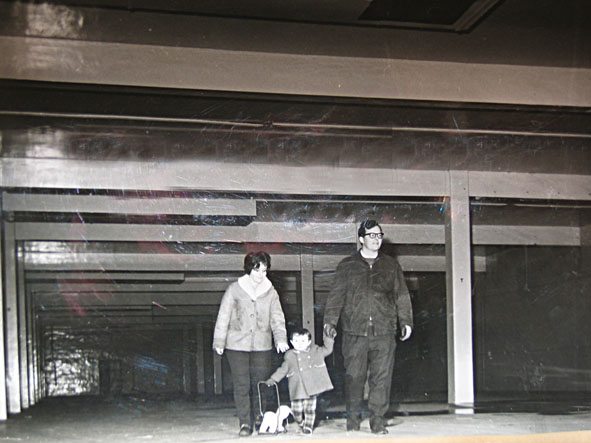
Picture NA7a © Keith Eldred. One of the DD buildings shortly after Keith Eldred bought the site in the mid 1960s.
|
|
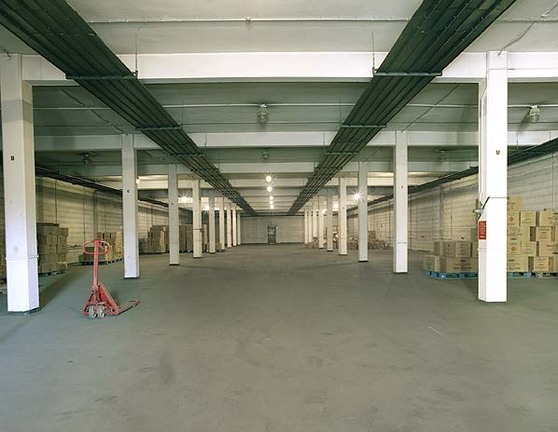
Picture NA7b © Nick Catford. This image is from a DD building of the same design at RAF Faldingworth in 2003. It retains the original open floor plan.
|

|
Picture NA8 © Sam Tolley. Another view of the front of the building, taken from the traverse to its front.
|
|
Picture NA9 © Sam Tolley. A view of the side of the building where the earth traverses can be seen sloping upwards in order to deflect a blast, should an internal explosion occur.
|
Western Storage Building
|
Picture NA10 © Sam Tolley. Looking towards the main entrance the western explosives storage building once stood on the image right. It was destroyed by fire in the 1980s after the plastics company that worked in there had a blaze. A local fireman present on scene told me there was little they could do as the only access was at the front and the building acted like an oven.
|

|
Picture NA11 © Sam Tolley. A view from atop the traverse that used to surround the building.
|
|
Picture NA 12 © Sam Tolley. Another shot showing the former site of the building.
|
